Saturday, 31 August 2013

Storyboard Animation

In this tutorial, I’m going to show you how to make your UI look more realistic by doing some animation to your controls like text block, buttons and other kind of controls. In this tutorial, I’m not dig deeply into animation part because it is a vast topic. Anyone who have interested and want to learn more, he will refer to MSDN link given below.
There are three type of animation
  • Color Animation
  •  Point Animation
  •  Double Animation

I'm going to focus on color animation. We can animate text block foreground property on button click event handler. One can do this from xaml as well as programmatically on run time. I will discuss both these methods.

Create Empty Project:

Go to visual studio 2012 and create a blank window store project and name it AnimateUI.


First Method

Change the MainPage.xaml code as shown below.

<Page
    x:Class="StoryBoradAnimation.MainPage"
    xmlns="http://schemas.microsoft.com/winfx/2006/xaml/presentation"
    xmlns:x="http://schemas.microsoft.com/winfx/2006/xaml"
    xmlns:local="using:StoryBoradAnimation"
    xmlns:d="http://schemas.microsoft.com/expression/blend/2008"
    xmlns:mc="http://schemas.openxmlformats.org/markup-compatibility/2006"
    mc:Ignorable="d">

    <Grid Background="{StaticResource ApplicationPageBackgroundThemeBrush}">
        <Grid.Resources>
            <Storyboard x:Name="myStoryboard">
                <ColorAnimation Storyboard.TargetName="nameText" From="Red" To="Green" Storyboard.TargetProperty="(TextBlock.Foreground).(SolidColorBrush.Color)" />
        </Storyboard>
        </Grid.Resources>
       
        <TextBlock x:Name="nameText" HorizontalAlignment="Left" Margin="523,171,0,0" TextWrapping="Wrap" Text="Hello World" VerticalAlignment="Top" Height="43" Width="226" FontSize="30" Foreground="Red"/>
        <Button Content="Start" HorizontalAlignment="Left" Height="43" Margin="830,140,0,0" VerticalAlignment="Top" Width="140" Click="StartButton_Click"/>
        <Button Content="Stop&#xD;&#xA;" HorizontalAlignment="Left" Height="41" Margin="830,214,0,0" VerticalAlignment="Top" Width="140" Click="StopButton_Click"/>

    </Grid>
</Page>


Write following code on button click event handler.

private void StartButton_Click(object sender, RoutedEventArgs e)
{
            myStoryboard.Begin();
}

You will see that as button click event file, foreground color of text block changes from red to green. 


If you want repeat behavior of animation means it contiously animate then add RepeatBehaviour property as shown.

<Storyboard x:Name="myStoryboard" RepeatBehavior="Forever">

Now when you click start button again, you will see that text block animating continually. 


To stop animation do this in stop button click event.

private void StopButton_Click(object sender, RoutedEventArgs e)
        {
            myStoryboard.Stop();
        }

Second Method

In above, we will create storyboard through our xaml file and now I will show how to achieve same behvious programatically on run time. See given below code.

private void StartButton_Click(object sender, RoutedEventArgs e)
        {
        
            Storyboard borad = new Storyboard();
            borad.RepeatBehavior = RepeatBehavior.Forever;
            ColorAnimation animation = new ColorAnimation();
            animation.From = Colors.Red;
            animation.To = Colors.Green;
            Storyboard.SetTarget(animation, nameText);
            Storyboard.SetTargetProperty(animation, "(TextBlock.Foreground).(SolidColorBrush.Color)");
            borad.Children.Add(animation);
            borad.Begin();
           
        }

This is it. Hope you will find this tutorial helpful in your daily life project. Note this is only a small portion of animation. For further information related to animation, use MSDN link that I have provided.

Saturday, 29 June 2013

Blank Page vs Basic Page Template

In my previous tutorial, i have discussed about windows store apps project template and in this tutorial, I am going to differentiate between blank page and basic page template that is provided while building window store apps project.

Blank Page Template

When you created a blank app project template, the main page that is shown in the solution explorer is created as default blank page by visual studio. As shown in the picture


Open the class view of main page  and you will see that this class is inherited from class Page.


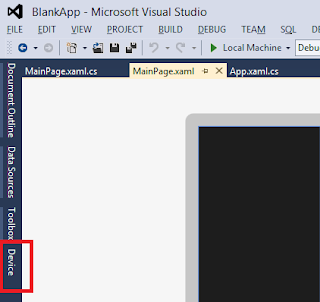
Disadvantage of main page is that it would not support the apps modes like Landscape, Filled, Snapped and Portrait. You would not able to modify your controls and data which displayed on the blank page when app changes its mode. You will check this by opening device tab as shown in below figures.


The Visual state of drop box show only <Base>  and does not provide information about any of given mode. So you are unable to modify app when it changes mode.

Basic Page Template

Basic page overcome the disadvantages of blank page and also support apps mode like Landscape, Filled, Snapped and Portrait.
Add a basic page template in your project.
  1. Right click on the project you have created.


     2.  Open add item and then add a basic page as shown below.


   3.  Click ok and visual studio create a basic page.


As shown in above picture, basic page contain a back button and your application name. It will automatically created by visual studio.  Now open the class view of basic page and you will see that it was inherited from class layout aware page.


Advantage of basic page is that it support apps mode like filled, snapped, landscape and also go back functionality which mean you will navigate back to the previous page. All these functionalities defined by layout aware page from which basic page inherits. Now see the class view of layout aware page by expanding common folder from solution explorer.


You will see that layout aware page define how the pages will handled when they are switched to other modes.
For clear picture, again open device tab and you will see visual state drop box contain all modes which were supported by basic page. Now clicked on view buttons and you will see how Back Button and Application Label changes according to page modes. See pictures below:


That's all. In my next post, i'm going to show how to implement error logging in metro using Metro Log.

Saturday, 15 June 2013

Building your first Window 8 Store application using C#/XAML

This tutorial teaches you how to create a simple Windows Store app using Extensible Application Markup Language (XAML) with C#. This tutorial teaches you what you need to know to build Windows Store apps.

In this tutorial, you learn how to:
  • Create blank App.
  • Grid App.
  • Split App.

Before you start

  • For this tutorial, you need Windows 8 and Microsoft Visual Studio 2012 for Windows 8.
  • You also need a developer license.
  • I assume that you have a basic understanding of XAML.

You can create one of these three types of App templates blank, Grid and Split App which are provided with visual studio 2012 on the basis of your need and according to your UI design. If you want to create and customize design according to your need, then go for blank apps. But if your requirement is to show group data and detailed data then go for Grid App and Split App. It provides basic templates which can reduce much of overhead and you can customize these app according to your data requirement.

Step 1: Create Blank App.

  1. Launch Visual studio 2012 for window 8.
  2. Select File > New Project.

          The New Project dialog appears. The left pane of the dialog lets you select the type of       templates to display.
     3.  In the left pane, expand Installed > Templates, then expand  Visual C# and pick the   Windows Store template type. 


4.  In the center pane, select the Blank App template.
      5.  In the Name text box, enter "FirstBlankApplication".
      6.  Click OK to create the project.
            
      Compile and run app.

Step 2: Create Grid App.

Repeat steps 1, 2, 3 as discussed in Step 1.


4.  In the center pane, select the Grid App template.
      5.  In the Name text box, enter "FirstGridApplication".
      6.  Click OK to create the project.
            
      Compile and run app.

Step 2: Create Grid App.

Repeat steps 1, 2, 3 as discussed in Step 1.


4.  In the center pane, select the Split App template.
      5.  In the Name text box, enter "FirstSplitApplication".
      6.  Click OK to create the project.
            
      Compile and run app.

In my next post, I’m going to differentiate between blank page and basic page template.